Can Cabinet Glaze Finishes Be Applied to Painted Cabinets? (How-To Guide)
Have you ever pondered whether cabinet glaze finishes can be applied to painted cabinets? At Fargos Art in Houston, we’re here to bring your cabinetry dreams to life with our expert advice and services. As specialists in cabinet glaze finishes and antique glaze cabinet refinishing, we’ve got the insight you need to transform your space beautifully.
In this article, we’ll explore what cabinet glazing is and how it works, assess if all painted cabinets can handle a glaze makeover, and walk you through a step-by-step guide to achieve the perfect finish. You’ll also learn about common mistakes to dodge and how to care for your newly glazed cabinets. Buckle up for a creative journey—your cabinets are in for a stunning transformation!
What is Cabinet Glazing and How Does it Work?
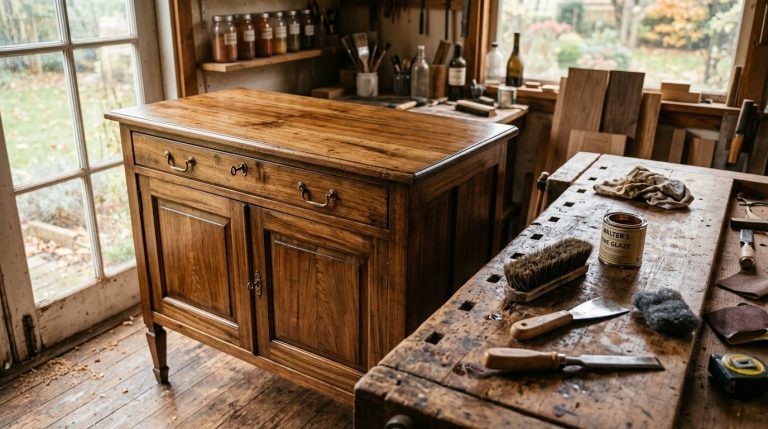
Cabinet glazing is an artistic finish applied to cabinets to bring out their natural beauty—in much the same way an artist highlights specific areas of a painting to give it depth and character. Essentially, a glaze is a thin, semi-transparent coating that sits on top of painted or natural wood surfaces to add dimension and visual interest.
The process involves applying a thin layer of glaze over the base paint or wood stain. This is then expertly manipulated to highlight or accentuate various features of the cabinetry. Crevices, corners, and mouldings catch the glaze differently, giving the cabinets a unique, lived-in look. It’s a fantastic way to revitalize older cabinets or inject a touch of sophistication into newer installations without a complete overhaul.
Glazing is not just for aesthetic purposes, though. It also provides an additional layer of protection against daily wear and tear (scratches, spills, you name it). Thanks to its versatility, it suits virtually all types of kitchen and bathroom styles—whether you’re going for rustic charm, vintage elegance, or a sleek contemporary vibe, glazing adapts beautifully. For more insights on cabinet glaze finishes, explore the cabinet glaze finishes available in Houston, TX.
Timing and technique are key. The glaze must be applied and wiped off at the right moment for optimal results. Too soon, and it won’t settle into the details; too late, and it might not move, making it challenging to achieve the desired effect.
Considering all this, you can see why glazing is both an art and a science, one that transforms mundane cabinetry into statement-making pieces.
Can All Painted Cabinets Be Glazed?
Not all painted cabinets are suitable for glazing. The success of applying a glaze finish heavily depends on the type of paint, as well as the cabinet’s current condition and preparation. While glaze can offer a beautiful finish, bringing depth and character, you need to consider several key factors before proceeding. Here’s what to take into account:
- Type of Paint: Cabinets painted with glossy or semi-gloss paint may not take glaze well without additional preparation.
- Condition of the Paint: Cabinets with peeling, chipping, or otherwise damaged paint will require repair or repainting before glazing.
- Surface Material: Some materials, like certain laminates, may not hold glaze properly and could result in an uneven finish.
- Existing Color: The base color affects how the glaze looks once applied. Darker paints might not show the glaze as distinctly as lighter shades.
- Preparation Work: Thorough sanding and cleaning are crucial to ensure that the glaze adheres correctly to the cabinet surface.
By carefully evaluating these aspects, you can determine which painted cabinets are appropriate candidates for a glazed finish. For more insights on achieving a stunning glaze effect, explore antique glaze cabinet refinishing techniques. After you’ve assessed, you’re ready to move on to gathering the right materials—let’s dive into that next.
What Materials and Tools Are Needed for Glazing Painted Cabinets?
Before you dive into glazing painted cabinets, gathering the right materials and tools is ESSENTIAL. Having everything on hand makes the process smoother and more enjoyable. Here’s a handy checklist of what you’ll need to get started:
- Glaze: Choose a high-quality glaze in your preferred finish (oil-based or water-based). The glaze should complement your existing cabinet paint for the desired effect.
- Paintbrushes: Select high-quality brushes of various sizes to ensure even glaze application—different sizes help reach all areas.
- Cheesecloth or Rags: Use soft, lint-free cloths to wipe off excess glaze, creating the perfect look without leaving fibers behind.
- Painter’s Tape: Protect areas you don’t want glazed by applying painter’s tape to edges and surfaces adjacent to your cabinets.
- Sandpaper: A fine grit sandpaper (220-grit) to lightly sand the cabinet surface. This ensures good adhesion between the paint and glaze.
- Drop Cloths: Place drop cloths beneath your work area to catch any drips or spills—keeping your space tidy.
- Protective Gear: Wear gloves and a mask to protect your hands and lungs if using an oil-based glaze, which can emit strong fumes.
- Mixing Stick: Use a stick to stir the glaze before application to ensure it’s well-mixed for consistent color and texture.
- Sealer (optional): A clear sealant can be applied after glazing for added durability and protection—especially in high-use areas.
With these supplies, you’ll be well-prepared to transform your cabinets with a stunning glaze finish. Remember, preparation is the key to a beautiful, enduring transformation.
Step-by-Step Guide to Applying Glaze Finishes on Painted Cabinets
Glazing cabinets can revitalize your kitchen or bathroom—adding depth and character to painted surfaces. It’s a manageable DIY project if you follow the right steps. Here’s a straightforward guide to help you achieve a professional-looking glaze finish on your painted cabinets:
- Prepare Your Area: Start by laying a drop cloth on the floor to protect it from spills. Remove cabinet doors and drawers, and set them on a flat, stable surface.
- Clean the Cabinets: Use a mild detergent and water to clean the cabinets. This removes dirt, grease, and any residues that could prevent the glaze from adhering properly.
- Sanding: Lightly sand the painted surfaces with fine-grit sandpaper (220 grit works well). This creates a slightly roughened surface to help the glaze stick better.
- Dust Off: After sanding, wipe away any dust using a tack cloth. Ensuring a dust-free surface is essential for a smooth finish.
- Apply the Glaze: Using a clean brush, apply the glaze in small sections. Work quickly, as glaze can dry fast. You can use a rag for more control and to achieve the desired look.
- Blend the Glaze: Immediately after applying, use a clean, dry cloth to blend and wipe off excess glaze. This step is crucial for achieving the perfect antique or distressed look.
- Let It Dry: Allow the glaze to dry completely according to the product instructions—usually 24 hours before handling the cabinets.
- Seal the Finish: Protect your hard work by applying a clear sealer. This adds durability and ensures your glazed cabinets withstand everyday wear and tear.
- Reassemble Cabinets: Once everything is dry and cured, reattach doors and drawers. Step back and admire your beautifully glazed cabinets.
With patience and attention to detail, your newly glazed cabinets will look stunning. Next, we’ll cover common mistakes to avoid for a flawless finish.
Common Mistakes to Avoid When Glazing Painted Cabinets
Glazing painted cabinets can add a unique depth and elegance to your kitchen or bathroom, but it’s crucial to approach the task with care. Certain mistakes can not only ruin the aesthetic appeal but also damage the cabinets themselves.
The first major pitfall is skimping on preparation. Before applying glaze, the cabinet surfaces should be meticulously cleaned and dried. Any grease, dirt, or residual paint can cause the glaze to adhere unevenly, leading to blotchy or unsightly finishes.
Another common mistake is using the wrong type of glaze. Glazes come in both oil-based and water-based varieties. Choosing the wrong one for your paint type can lead to poor adhesion or the glaze not curing properly. Always check the manufacturer’s recommendations to ensure compatibility.
Rushing the application process is also something to avoid. Taking your time is key—especially when working the glaze into crevices and details with a brush or rag. Speeding through this step often results in missed spots and an inconsistent look.
People also tend to overdo it by applying too much glaze or layering excessively. This mistake can create a heavy, unnatural appearance. Instead, start with thin layers and build gradually to achieve the desired opacity and depth.
Finally, neglecting to seal the finished surface can open up your cabinets to damage. A clear protective topcoat should always be applied after glazing to safeguard the finish from moisture, wear, and tear.
By avoiding these common mistakes, you’ll ensure that your glazing project enhances the beauty of your painted cabinets (and stands the test of time).
How to Maintain and Care for Glazed Painted Cabinets
Glazed painted cabinets bring elegance to your home. Their beauty can last for years with the right care. Here’s everything you need to know to maintain them efficiently.
Regular Cleaning
Dust accumulates quickly—wipe down your cabinets weekly with a soft, damp cloth. For deeper cleaning, use a mild soap mixed with warm water. Avoid abrasive cleaners that can damage the glaze.
Preventing Damage
Glazes add depth, but they can still scratch or chip. Use gentle cleaning tools and avoid sharp or rough materials. Be cautious with cabinet handles; excessive force might compromise the finish.
Handling Spills
Act fast on spills—especially those from acidic foods or liquids. Wipe them immediately using a damp cloth to prevent staining or weakening the glaze.
Humidity and Temperature Control
Excessive moisture and temperature changes can affect the glaze. Use dehumidifiers in humid climates and keep the kitchen well-ventilated to protect the finish.
Periodic Inspections
Regularly check for chips, scratches, or wear. Small repairs can be handled with touch-up kits that match your cabinet’s finish. For significant damage, consider consulting a professional.
Re-Glazing When Necessary
Over time, even with great care, the glaze might need refreshing. Re-glazing extends the cabinet life and restores its beauty. Professionals can ensure a flawless finish that matches the original.
These steps will help keep your glazed painted cabinets looking their best—maintaining their charm and durability over time.
Conclusion
Applying cabinet glaze finishes to painted cabinets is a fantastic way to breathe new life into your kitchen or bathroom without the expense of full renovations. This process not only adds depth and character to the cabinets but also enhances the overall aesthetic of your space. With the proper techniques and tools, you can achieve a masterful finish that adds a personalized touch to your home. At Fargos Art, we specialize in transforming your cabinets with our expertise in cabinet glaze finishes, ensuring each project reflects your unique style and vision.
Serving the Houston area, including River Oaks, Memorial, Tanglewood, and beyond, Fargos Art is dedicated to delivering top-notch craftsmanship and personalized service. Whether you are interested in antique glaze cabinet refinishing or exploring other exquisite finishes like Venetian plasters or metallic ceilings with 3D stencils, our experienced team is here to help you achieve your design goals. To bring a touch of artistry into your home, contact Ileana Farias at Fargos Art today by calling (832) 277-6757 or sending an email to fargosartco@gmail.com. Transform your space with Fargos Art – where beauty meets craftsmanship.