How to Install Metallic Ceilings with 3D Stencils in Texas Homes (Step-by-Step Guide)
Are you fascinated by the idea of installing metallic ceilings with 3D stencils in your Texas home? At Fargos Art, based in the vibrant city of Houston, we believe that metallic ceilings can completely transform your living space, adding an aura of elegance and depth that captivates any onlooker. As experts in creative finishes, we’re here to guide you through the step-by-step process of installing these stunning features, making your home truly one-of-a-kind.
In this article, we’ll dive into the benefits of choosing metallic ceilings for your Texas abode, essential tools and materials you’ll need, and how to prepare your space for the install. With our expertise, we’ll walk you through the entire installation process and help you troubleshoot any common issues, ensuring that your ceilings shine and shimmer with style. Join us as we explore the artistic possibilities of metallic ceilings with 3D stencils, and let the transformation begin!
What Are Metallic Ceilings and Why Choose Them for Texas Homes?
Metallic ceilings are a bold and modern design choice for any home. Made from metal tiles or panels, they bring a sleek and contemporary look to interiors. But what makes them a fantastic choice for Texas homes? Let’s dive into their unique advantages.
Durability and Strength
One of the key benefits of metallic ceilings is their durability. They are built to LAST. Unlike traditional ceiling materials, metal doesn’t warp or crack over time. This makes them ideal for withstanding the varied Texas weather—from scorching summers to unexpected storms.
Reflective Properties
Metallic ceilings are naturally reflective. They can enhance natural lighting in a room, reducing the need for additional lighting fixtures. This is a practical benefit in the sunny state of Texas, helping to maintain bright and airy spaces while potentially reducing energy consumption.
Aesthetic Appeal and Versatility
There’s no denying it—metallic ceilings make a statement. They add a touch of sophistication and can be adapted to complement various interior styles. From industrial chic to modern minimalist, metallic ceilings can transform the aesthetic of any room effortlessly.
Moisture and Heat Resistance
In a state known for its heat and humidity, having moisture and heat-resistant ceilings is a game-changer. Metallic ceilings are resistant to mold, mildew, and heat, making them particularly suitable for areas like kitchens and bathrooms.
Easy Maintenance
Less time spent cleaning is always a win! Metallic ceilings are easy to maintain—just a wipe down with a damp cloth keeps them shiny and clean. This low-maintenance requirement adds to their growing popularity among Texas homeowners.
With all these benefits, it’s no wonder metallic ceilings are becoming a preferred choice in Texas homes. Up next, we’ll explore the tools and materials needed if you’re considering an installation with 3D stencils.
What Tools and Materials Are Needed to Install Metallic Ceilings with 3D Stencils?
Before diving into the installation of metallic ceilings with 3D stencils, it’s crucial to gather all the necessary tools and materials. Having everything prepared won’t just streamline the process—it ensures you’re ready for any surprise that may come up. From basic tools to specialized equipment, here’s what you need:
- Measuring Tape: For accurate measurements, ensuring everything fits perfectly.
- Ladder: A stable ladder is essential for reaching the ceiling without risk.
- Level: To guarantee your ceiling panels are straight and even.
- Pencil: For marking the placement of ceiling tiles and stencils.
- Utility Knife or Scissors: For cutting the stencils or trim to size as needed.
- Adhesive or Construction Glue: To securely attach the 3D stencils and metallic ceiling tiles.
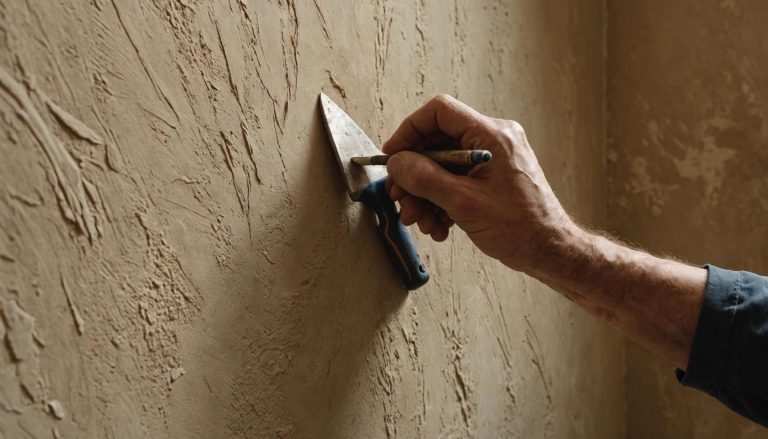
- Trowel or Spatula: To apply adhesive smoothly without air bubbles.
- Soft Cloth or Sponge: Necessary for cleaning any excess glue and polishing the panels.
- Safety Gear: Gloves and goggles to keep your hands and eyes safe during installation.
- 3D Stencils: The key aesthetic component that adds depth and dimension to your ceiling.
- Metallic Ceiling Tiles: Choose styles and colors that complement your home’s design.
With these tools and materials at your disposal, you’re ready to transform any room with a stunning metallic ceiling. Stay tuned for our next section, where we dive into the preparation needed before installation begins.
How to Prepare Your Ceiling for Installation of Metallic Tiles with 3D Stencils
Proper preparation is essential for a successful metallic ceiling installation. Preparing the ceiling sets the foundation—it ensures the new tiles adhere well and look flawless. Before diving into the installation, follow these important steps to get your ceiling ready.
- Clear the Workspace: Remove furniture and valuables from the room to prevent any damage or obstruction. It also gives you more room to maneuver.
- Inspect the Ceiling: Check for any cracks, holes, or moisture issues. Address these problems beforehand to avoid future complications. Ceiling integrity is crucial.
- Clean the Surface: Dust and grime can prevent proper adhesion. Use a sponge or cloth to clean the ceiling thoroughly with a mild detergent. Make sure it dries completely.
- Prime the Ceiling: Apply a primer appropriate for metal tile or stencil adhesion. Primer ensures better grip for the tiles and stencils—critical for a long-lasting installation.
- Measure and Mark: Use a measuring tape to determine the layout for your metallic tiles. Mark key points with a pencil—this helps in aligning the tiles correctly and maintaining symmetry.
- Prepare the Stencils: Cut your 3D stencils as necessary. Check for fit and design alignment on a small section of the ceiling before full implementation.
Careful preparation guarantees a smooth installation. Take your time with each step to avoid mistakes that could affect the final appearance. Next, we’ll walk you through the step-by-step installation process for achieving that perfect metallic ceiling look.
Step-by-Step Installation Process for Metallic Ceilings Using 3D Stencils
Installing metallic ceilings with 3D stencils transforms a space, adding elegance and dimension. It might seem daunting, but with the right preparation and steps, it’s achievable. Here’s how to proceed for a stunning ceiling upgrade:
- Gather Your Tools: Before starting, ensure you have all necessary tools at hand—this will save time and prevent unnecessary stress during installation.
- Measure the Ceiling: Accurately measure your ceiling dimensions to determine how many tiles and stencils you’ll need. Double-check these measurements!
- Plan Your Layout: Decide the pattern and layout you wish to achieve. A clear plan will make the installation smoother and prevent mistakes.
- Cut the Initial Tiles: Start by cutting tiles to fit the edges of your ceiling—or where necessary—to ensure a perfect fit.
- Apply Adhesive: Use a suitable adhesive for metallic tiles. Apply it to the back of the tiles and press them firmly onto the ceiling. Follow the manufacturer’s guidelines for drying times.
- Stencil Application: Once the tiles are in place, carefully use your 3D stencils to add the desired design. Align them properly and apply paint or texture according to your design plan.
- Seal the Design: After the stencil design dries, apply a sealant to protect the finish and enhance durability.
- Clean Up: Tidy up any excess adhesive or paint. Ensure all tools are cleaned and stored properly.
- Final Inspection: Finally, inspect your work. Look for any gaps or uneven areas, and make adjustments as needed.
Following these steps ensures a meticulous installation process, resulting in a beautiful and sophisticated metallic ceiling. This project not only enhances aesthetics but also adds value to your home.
Troubleshooting Common Problems When Installing Metallic Ceilings
Installing metallic ceilings with 3D stencils can be a game changer for your home’s aesthetics. But, like any home improvement project, it can come with its fair share of challenges. Being prepared to troubleshoot these issues can save you time, money, and frustration.
Problem: Tiles Not Sticking Properly
One of the most common issues is tiles that won’t adhere to the ceiling. This can happen due to dust, dirt, or a wet surface. Make sure the surface is CLEAN and DRY before applying adhesive.
Also, double-check the adhesive type. Not all adhesives are suitable for metallic tiles. Use a strong, industrial-grade adhesive designed for metal application.
Problem: Stencil Alignment Issues
Misaligned stencils can ruin the 3D effect. Ensure precise measurement before applying. Mark outlines lightly with a pencil to guide your placement.
Consider a dry run without adhesive to align the stencils perfectly before committing.
Problem: Uneven Tiles
Uneven tiles can disrupt the seamless look of your ceiling. This usually happens if the ceiling surface isn’t level to start with.
Use a level tool to assess and correct any surface irregularities before installation. Proper surface prep makes all the difference.
Problem: Peeling or Bubbling
If you notice peeling or bubbling, it’s often due to trapped air or moisture. Applying too much adhesive can also cause this.
Always apply adhesive in even, thin layers and use a roller to remove air bubbles. If moisture is the culprit, consider improving the room’s ventilation.
Problem: Metal Tile Discoloration
Discoloration can occur due to chemical reactions or exposure to humidity. Use rust-resistant materials when possible.
Applying a clear sealant post-installation can help protect against discoloration (and add longevity to your beautiful metallic ceiling).
With these troubleshooting tips, you’re better equipped to handle potential hiccups during your ceiling installation, ensuring a beautiful finish that stands the test of time.
How to Maintain and Clean Metallic Ceilings with 3D Stencils Post-Installation
Maintaining the stunning look of your metallic ceilings with 3D stencils doesn’t have to be a chore. With some simple care routines, you can ensure that these ceilings remain a breathtaking feature in your home. Regular maintenance will not only keep them looking refreshed but also extend their longevity.
Here are some tips for maintaining and cleaning your metallic ceilings effectively:
- Dust Regularly: Use a soft, microfiber cloth or a feather duster to gently remove dust and debris without scratching the surface.
- Avoid Harsh Chemicals: When deep cleaning is needed, opt for mild, non-abrasive cleaners. Harsh chemicals can damage the metallic finish.
- Spot Clean Stains: For stubborn spots, dampen a cloth with a gentle cleaner and lightly dab the area until clean. Avoid scrubbing vigorously.
- Use a Step Ladder Carefully: When cleaning high ceilings, ensure you have a stable ladder and sufficient support to prevent accidents.
- Prevent Moisture Build-Up: Proper ventilation in rooms like kitchens and bathrooms helps reduce humidity that can affect the ceiling’s material over time.
- Inspect Regularly: Periodically check for any signs of damage or wear and address issues promptly to prevent further deterioration.
- Consult Professionals for Repairs: If there’s significant damage or if cleaning isn’t improving the appearance, consider seeking professional assistance.
By incorporating these simple maintenance tips, you can keep your metallic ceilings with 3D stencils in pristine condition for years to come, ensuring they always make a statement in your home.
Conclusion
Installing metallic ceilings with 3D stencils is an excellent way to enhance the aesthetics and value of Texas homes. This sophisticated design choice adds a unique dimension and luxurious appeal to any interior space. By following the step-by-step guide, you can achieve a stunning and professional finish, transforming your home into a masterpiece that reflects your personal style.
At Fargos Art, we specialize in creating breathtaking interior transformations with an array of services that include metallic ceilings with 3D stencils. Whether you’re looking to revamp your home in Houston or the surrounding areas like River Oaks, Memorial, or Bellaire, our skilled team is here to help. For more information or to schedule a consultation, contact Ileana Farias at (832) 277-6757 or email us at fargosartco@gmail.com. Let us bring your vision to life with our expert craftsmanship and dedication to quality.